Pages

Thursday, May 10, 2018


How To Draw Roses

How To Draw Roses
I have been playing around with drawing roses, trying to come up with an easy way to do it for anyone that might like to.  I wound up with this tutorial. Give it a try. It might take a bit of practice, but if you keep at it, soon enough, there will be sketches of roses all over your house (believe me, I know).

How To Draw Roses

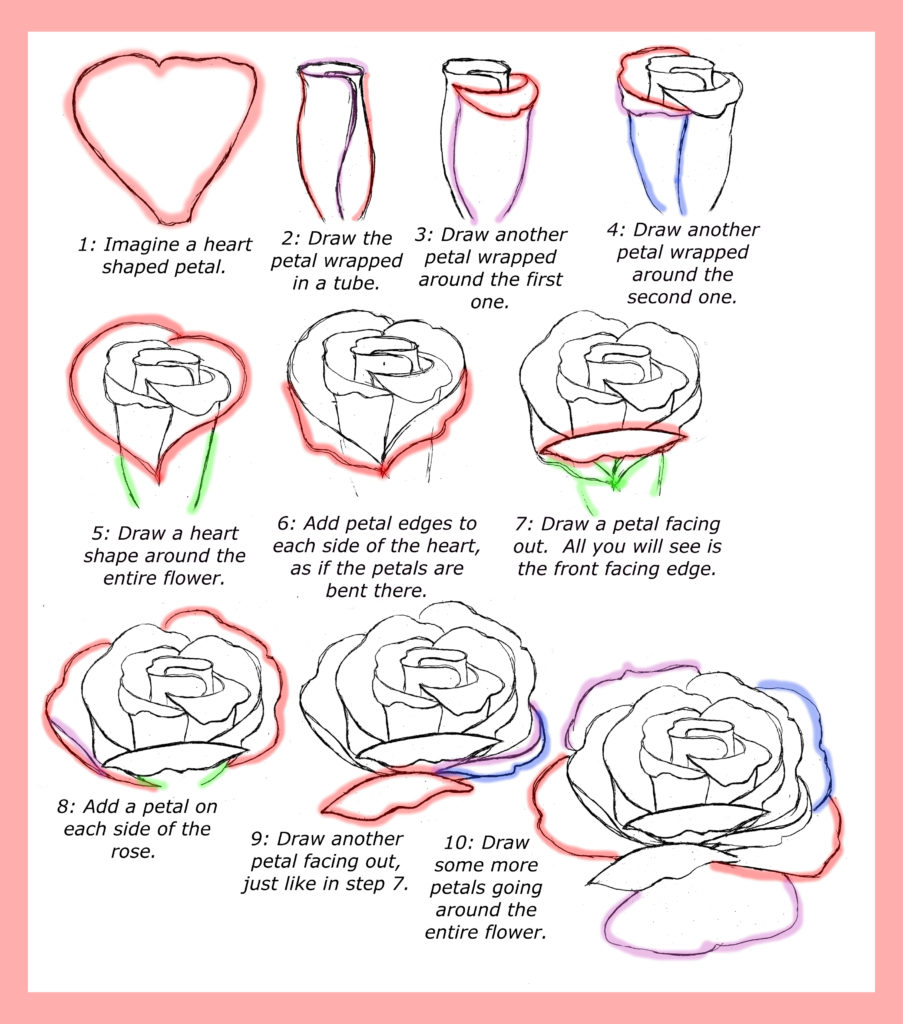
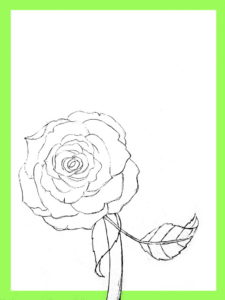
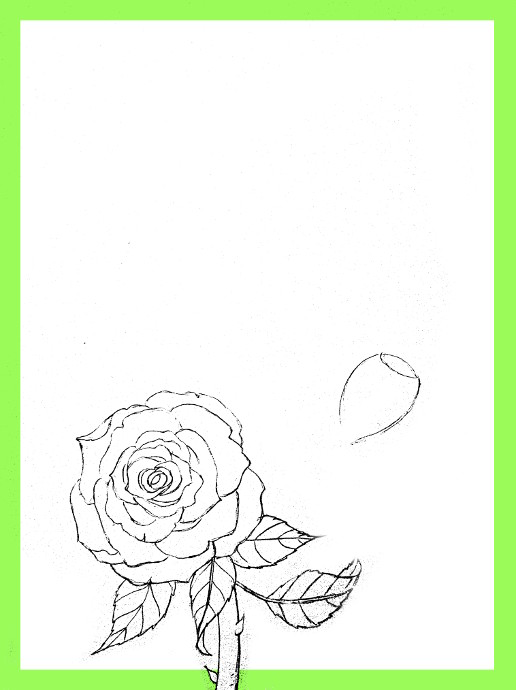
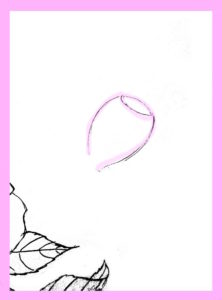
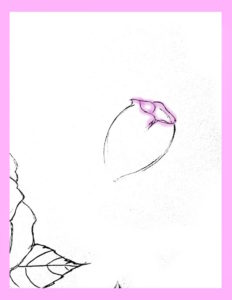
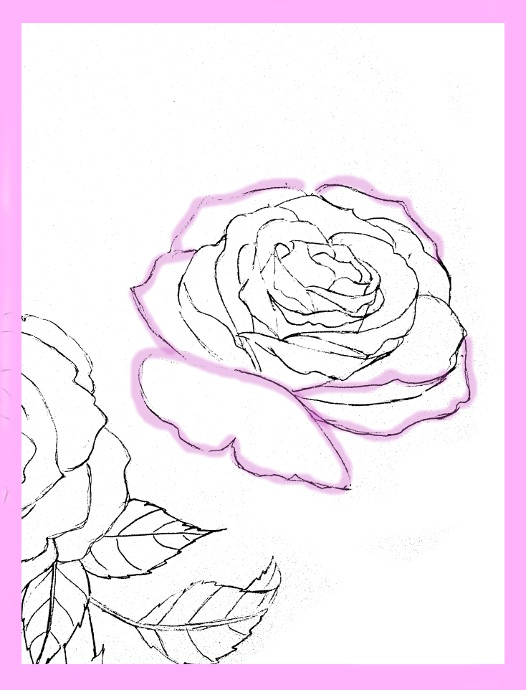
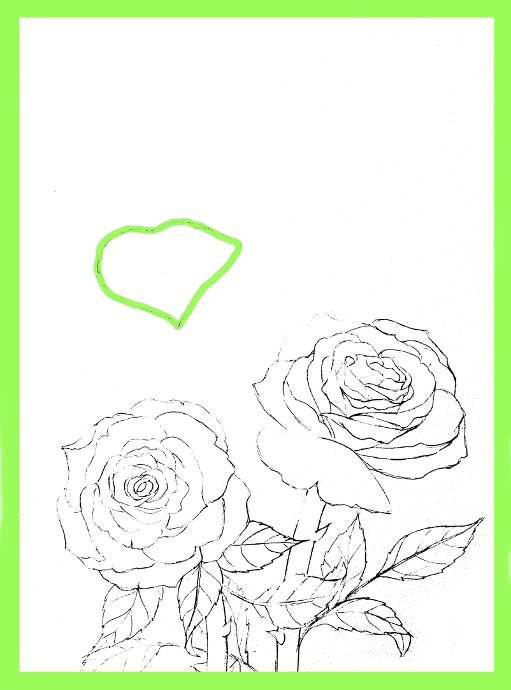
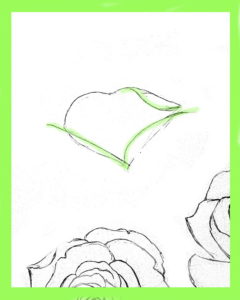
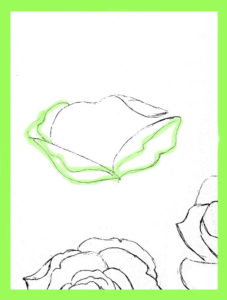
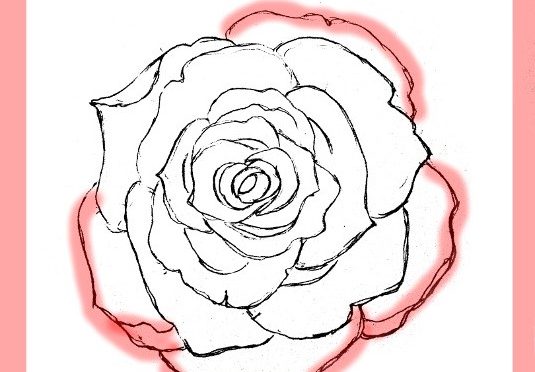
I made this quick poster to show how to do it right away, and then if you want more details, scroll below.  You can see that I used different colors for each step.  Pink/red was the first color: as in the first line to be done on each step, purple is next, and blue is last, the light green is what was erased at the end of the step. Beyond that, it’s just imagining the petals, like in step 1, and putting them together to form a flower. Whether you are doing a sideways view, or view from the top, it’s all about putting the petals together.
How to draw roses
***This page contains affiliate links.***
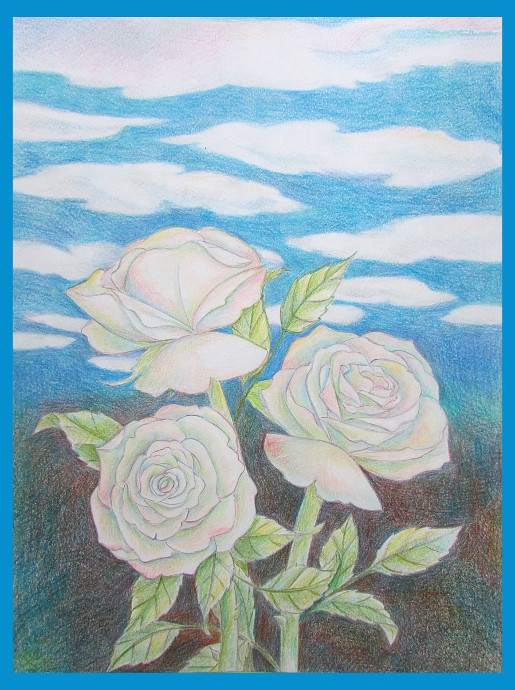
For the three roses I drew below, I used the Macro Refine Colored Pencils which I got for my birthday. They were different then the Prismacolors that I love and use all the time, but a decent cheaper option for anyone that would want to color with pencils. I also used Strathmore Bristol Paper, 11 by 14 inches for this drawing.

How To Draw Roses: Detailed Step by Step Directions

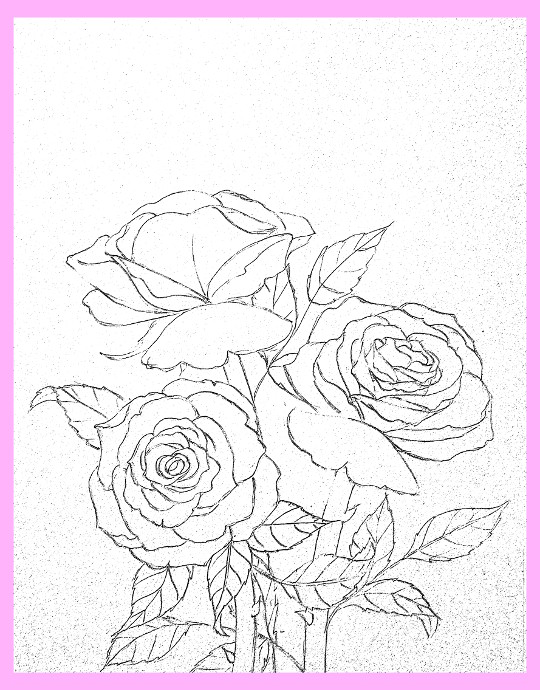
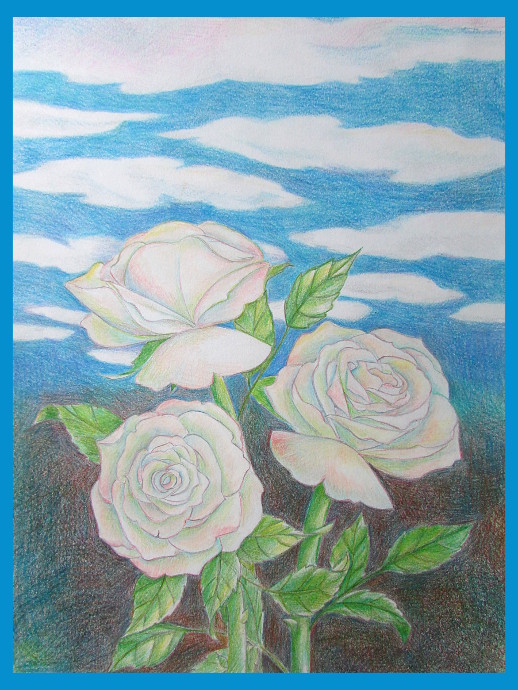
I drew three roses, the first one is facing the viewer, the second one is a bit sideways, and the last one is facing half way away from the viewer.
How To Draw RosesHow To Draw Roses
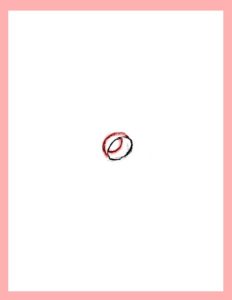
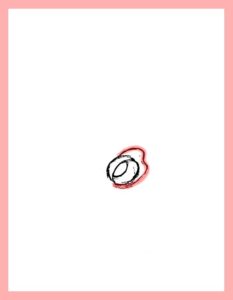
Start by drawing a small oval shape. That will be the center of the rose. Add a few lines for the inside of the center and the outside of the center. Then begin adding petals.
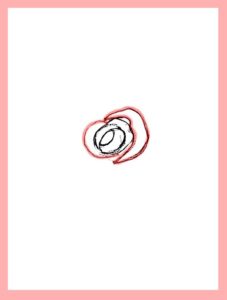
How To Draw RosesHow To Draw RosesKeep adding rose petals radiating from the center. They are just slightly curved lines going around in the circle when you think about it.
How To Draw RosesHow To Draw Roses
Keep adding more and more petals as you go. I like to make some of the petals a bit pointy toward the center.
How To Draw RosesHow To Draw Roses
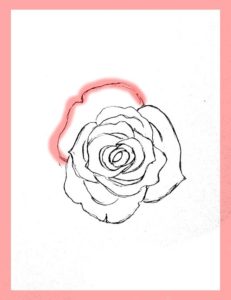
For the rose that is facing the viewer, just keep working in a circle, adding anywhere between 3 to 5 petals for each layer.
How To Draw RosesHow To Draw Roses
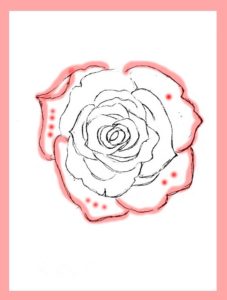
Try to make sure that the flower looks somewhat balanced. For the photo on the right, I put dots to indicate which petals were drawn first.
How To Draw Roses
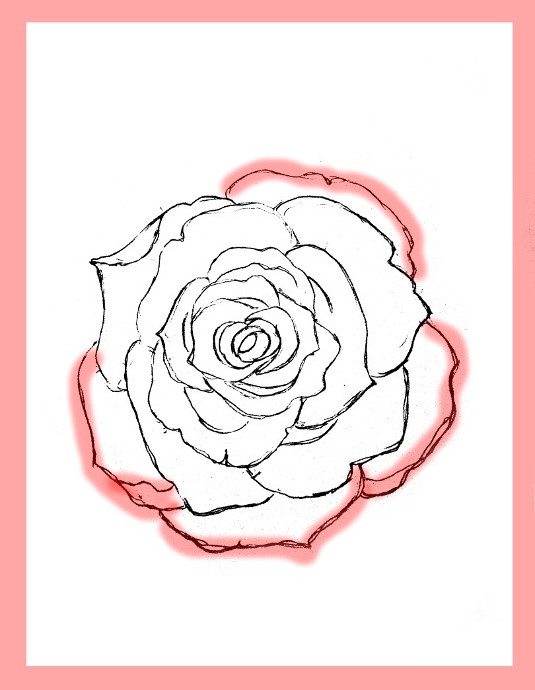
Add a few more petals going all around the circle. All done with the first flower!
How To Draw RosesHow To Draw Roses
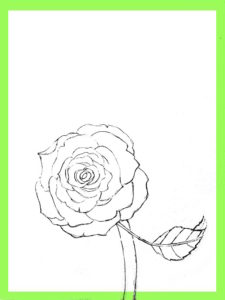
Don’t forget to add a stem and a few leaves.
Here is the first rose completely done, and the beginnings of the second rose.
How To Draw Roses
Time to do the second flower!
How To Draw RosesHow To Draw Roses
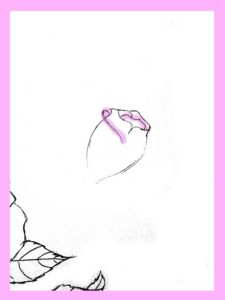
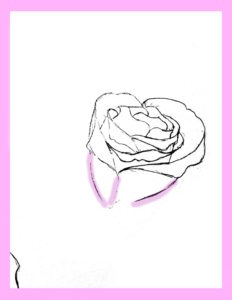
For the second flower, start with a tube with a slight opening, like the photo on the left. Then, change the opening by adding a few curved lines to indicate petals.
How To Draw RosesHow To Draw Roses
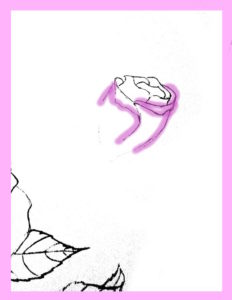
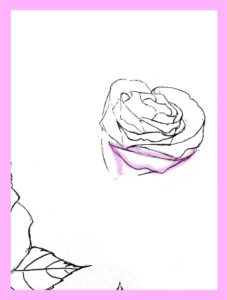
Keep at it. To draw a petal that wraps around the rose center, begin at the outer line of the center, and bring the line around to the front, like the photo on the left.  After that, you can add two lines extending from each end of the newly formed petal, and draw a slightly curved line to indicate the the petal is bent a bit at the edge.
How To Draw RosesHow To Draw Roses
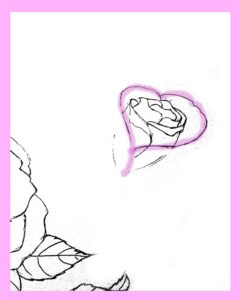
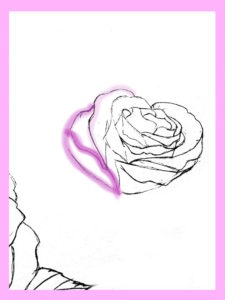
To make a slight opening, draw two curved lines going from the back of the rose (photo on the left).  The lines should form a heart like shape in the front of the rose.  Then add a few more indications that the petals are bent and curved (photo on the right).
How To Draw RosesHow To Draw Roses
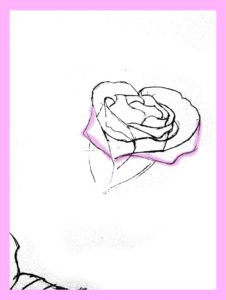
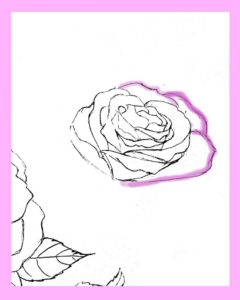
Each time you draw a petal, add lines extending from the edge, down to the base of the rose (photo on the let).  Add one more petal, this one is facing out more, so the viewer can only see the curved part (photo on the right).
How To Draw Roses
How To Draw Roses
Keep adding petals, now expanding outwards more, so that they look open.  Make sure that they are ‘attached’ (in a manner of speaking) to the base of the rose.
How To Draw Roses
As the last step, add a few more petals all around, including one that’s bending outward. As you can see from the photo, that petal covers a part of the base.
How To Draw Roses
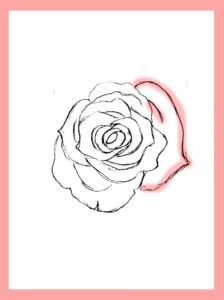
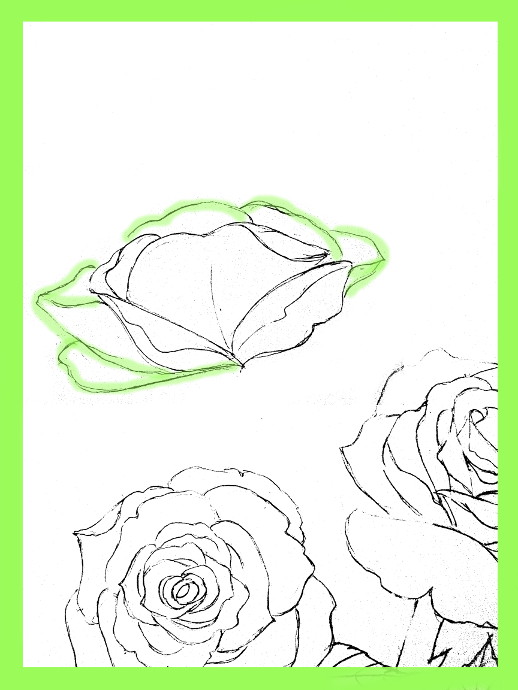
Make sure to draw a stem and a few leaves for the second rose.  It is time to start the third rose.  This time, it’s facing away from the viewer, so I start with one heart shaped petal, just like in the photo above.
How To Draw RosesHow To Draw Roses
I add a few petals, not too many, all attached to the base of the rose.
How To Draw Roses
Add even more petals showing from behind the first part of the rose.
How To Draw Roses
I added one more petal facing outward, just like in the second flower, and a stem with some leaves.

Coloring The Roses White:

How To Draw Roses
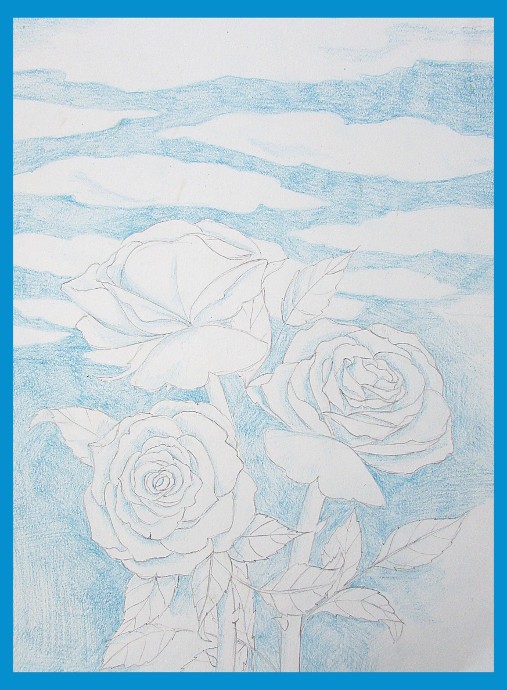
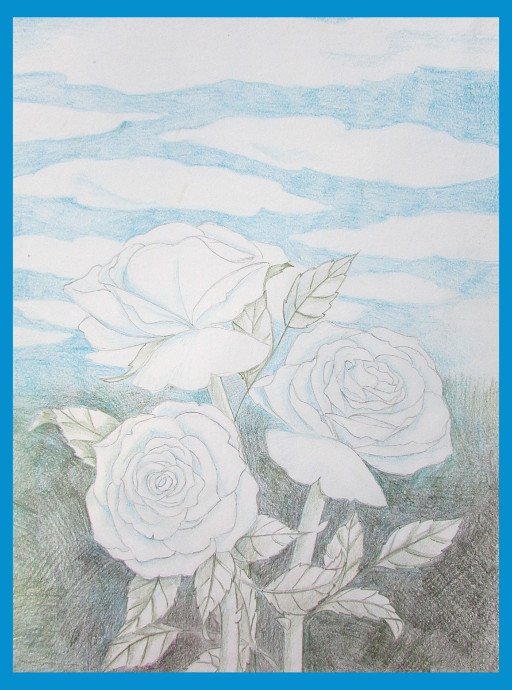
I wanted to make it look like there is an open sky in the background, so using a light blue, I drew a few clouds.  Then using the same light blue, I colored in a bit of shadows on the roses and leaves, a bunch of blue for the sky, and the background.  All done in one color.
How To Draw Roses
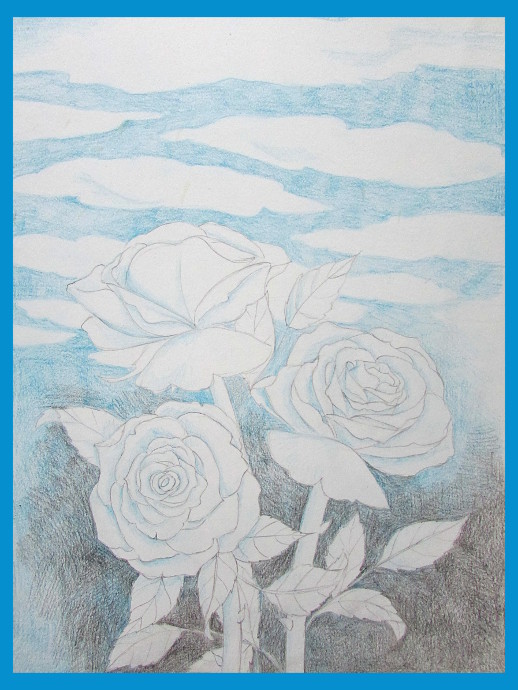
Next, I used black to darken the bottom of the page, where it’s not just the sky, but what ever background might be there.
How To Draw Roses
Next I used dark pine green to add even more dimension, and even some details on the leaves.
How To Draw Roses
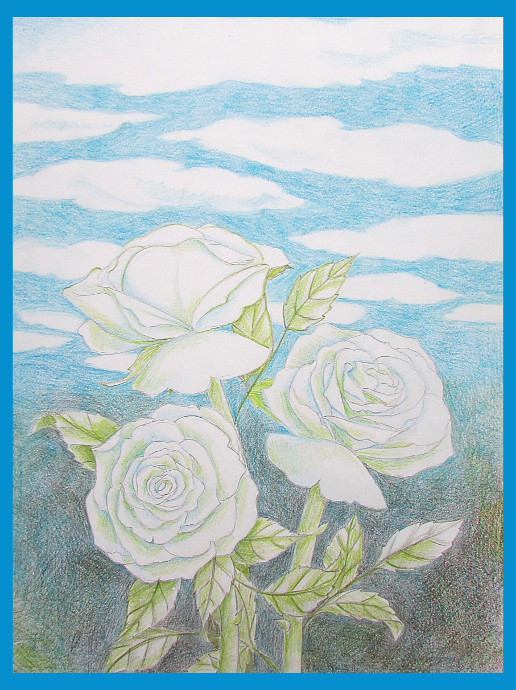
Using a light green, I added more color to the leaves and stems, and more shading for the white roses.
How To Draw Roses
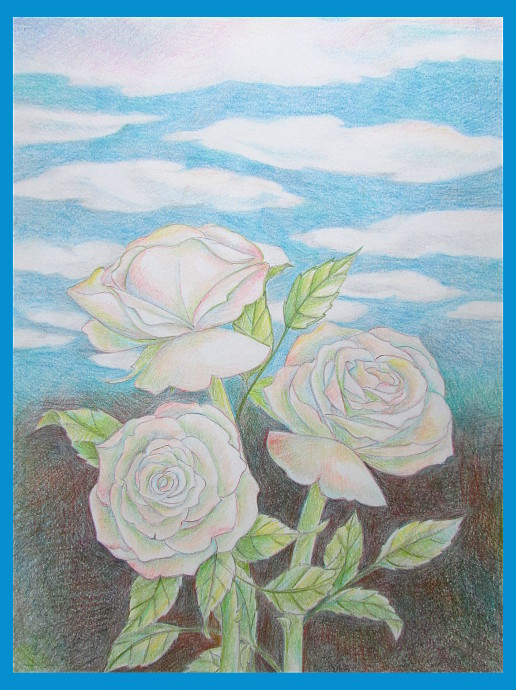
Since white is really just a collection of various colors, I used some pink, tan and yellow to add shadows to the roses. I also used silver to do a bit of shading on the clouds, and added more blues to the sky and the roses.
How To Draw Roses
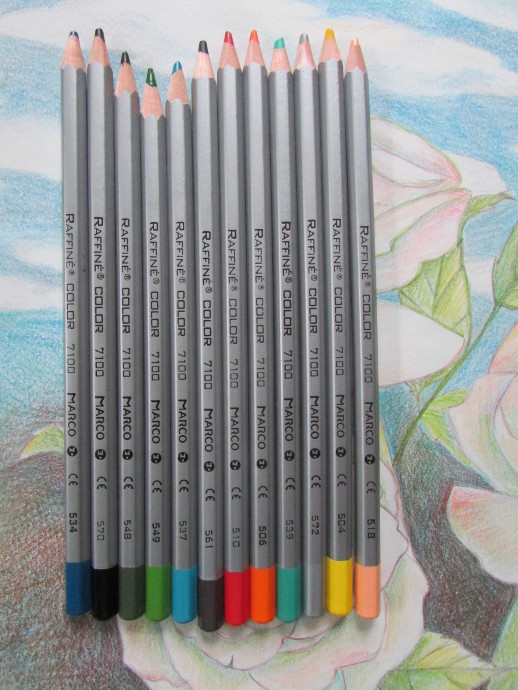
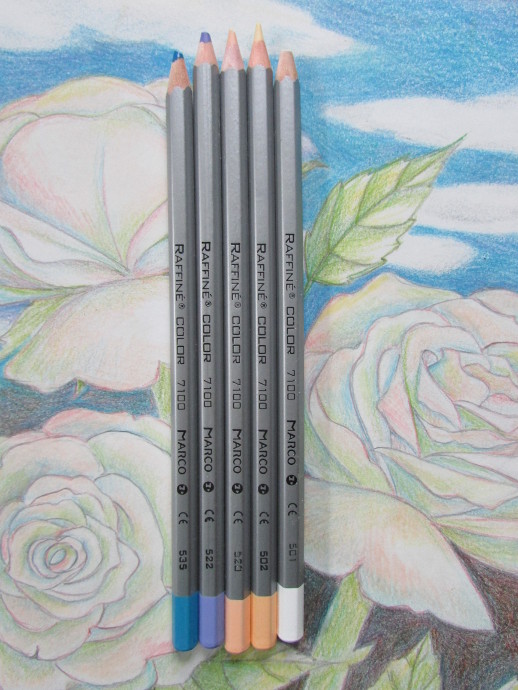
These are the colors I used so far.  In order I used from left to right.  Every time I used a color on the picture, I made sure to use it to darken the bottom portion of the picture.
How To Draw Roses
Next I used bits of purple, and more blue for the sky and to darken the bottom area.
How To Draw Roses
I used the five colors above to add to the sky and the roses.  The white pencil I used profusely on the white areas of the flowers and the clouds. I also added more greens to the leaves and stems.
Here is the final result, I do wish the colors were a bit deeper, but I will try again next time:
How To Draw Roses

Wednesday, May 2, 2018

How to Draw the Earth


How to Draw the Earth – Really Easy Drawing Tutorial

"To see the earth as it truly is, small and blue and beautiful in that eternal silence where it floats, is to see ourselves as riders on the earth together, brothers on that bright loveliness in the eternal cold — brothers who know now they are truly brothers."— Archibald MacLeish, American Poet
The earth - according to astronomer Carl Sagan, it is "a mote of dust suspended in a sunbeam," the only rock in the universe known to support life. The earth, a small planet orbiting a small star at just the right distance and axial tilt to sustain life, has been host to every human, animal, and plant that has ever lived. The planet hosts the correct amounts of water, atmospheric composition, natural cycles, and magnetic shielding for such life to exist.
Edgar Mitchell, an astronaut for the Apollo space program, described it this way: "A sparkling blue and white jewel, a light, delicate sky-blue sphere laced with slowly swirling veils of white, rising gradually like a small pearl in a thick sea of black mystery."
The popular television series Star Trek opened with the words, "Space, the final frontier." Yet, unexplored frontiers remain on earth as well. More than 70 percent of the surface of the earth is covered by oceans, the depths of which have not been explored. Scientists estimate that at the current rate of discovery, it will take over 1,000 years to catalog all of earth's species.
Would you like to draw this space faring jewel? This simple, step-by-step drawing tutorial makes doing so easy. All you will need is a pencil, pen, or marker, and a sheet of paper. You may also wish to use crayons, paints, or colored pencils to shade the finished planet.

Watch 'How to Draw the Earth' Video Tutorial

Like my drawing tutorials?
Get more on YouTube:
Step-by-Step Instructions for Drawing the Earth

How to draw the earth - step by step drawing tutorial
1. Draw a circle to outline the shape of the earth.
2. Draw a jagged, diagonal line across the circle. This will form the Pacific Ocean side of the North American continent. If you wish to make your drawing geographically accurate, pay attention to the shape of the line in our example drawing. For example, do you see how Baja, California, where the United States joins Mexico, doubles back on itself?
3. Draw a convoluted, curved, jagged line across the top of the globe. This is the northern side of the North American continent, which includes Alaska and Canada.
4. Finish enclosing North America using another jagged line. Note how the Florida panhandle juts out from the mainland, and how the Gulf of Mexico folds inward.
How to Draw a Star: Featured image
How to draw a desert - featured image
How to draw a sun: Featured image
5. Outline the western edge of South America using a jagged line. This includes countries such as Ecuador, Peru, and Argentina.
6. Enclose South America using a jagged line, representing its eastern seaboard.
7. Enclose a few irregular shapes at the top of the globe. These landmasses represent Greenland, the eastern coast of Europe, and the northern reaches of Russia.
8. Enclose islands, irregular shapes, north of Canada and in the Caribbean region, between North and South America. These latter islands include Cuba, Puerto Rico, the Dominican Republic, and Haiti.
9. Enclose additional small shapes north of Canada, near Europe, and at the bottom left of the globe. The latter represents Australia and Tasmania.
10. Color your globe. As seen from space, the earth's oceans are blue and its landmasses are green and brown. White polar ice caps might be seen at its top and bottom, and our planet is often swaddled in bands of white clouds.
Are you drawing a solar system? Don't forget to include other celestial bodies, such as distant stars and our own sun.

Tuesday, May 1, 2018

DRAWING THE HUMAN EYE

Drawing the Human Eye

DRAWING THE HUMAN EYE


We can all probably draw the human eye, we draw the oval shape with the iris and pupil. I consider that to be a basic sketch of the eye. Before you draw a realistic eye you must first study what it really is. I will post a closeup picture of an eye so you can see what it looks up close. We all have them, but I’m sure that most of us haven’t really paid attention to what it really looks like up close. If you really want to draw a realistic eye, i suggest you study it well. This goes for any other object or feature. I’ll show the techniques that i use but it will be much easier if you understand what you are drawing. Well here it is.
Take a look at the pupil(the black area in the center), this area contracts in size when light hits it. The area around the pupil is the iris, this is the area that gives us our eye color. As you can see its not just a blotch of brown, its made up highlights and shadows and this is what we will concentrate on. Adding the right shadows and highlights gives they eye depth and life. All eyes are different and you will see that adding different highlights in different areas gives different effects. The white dot close to the eye is the reflection of light source, it can be big or large, it depends if the person is indoor or outdoor. Another thing you must take into consideration is the shape of the eye. The surface of the eye is not flat, it has a curve to it. So taking that into consideration when drawing highlights will give the eye much more dimension. These are the tools that i used
  • 2h wood cased pencil
  • 2b 0.5 Mechanical Pencil
  • Kneaded Eraser
  • Color Blender
  • Smooth Bristol Paper
This is the final drawing of what we’ll be working on. I’ll try to give a detailed explanation of the whole process that i use. Again, study the picture above to get an idea of what you’ll be drawing. It will make much more easier and with time you will understand how to take the same steps yourself. With the same process try to draw the eye above so that you can practice.
Pencil Eye Tutorial

Step 1

Pencil Eye Drawing
Well we will start by drawing the outline, this can be a fast sketch, but enough detail to show the shape. I used 2b 0.5mm mechanical pencil. Make sure you don’t make the outline too dark or else you will have an outline in the end. The three round circles close to the pupil will be light source reflections.

Step 2

Pencil Eye Drawing
Start by filling in the pupil using the 6b progresso pencil. Make sure not to press too hard or else you will not be able to erase it easily if you need to. One good way to get really darks is to layer it. Start off by lightly going over with with the progresso pencil and then use the the color blender to blend it. Add another layer of pencil with progresso and do the same with blender. Keep on doing this until you are satisfied with it.

Step 3

Pencil Eye Drawing
Take your 4b progresso pencil and put down some graphite on a separate piece of paper. Get it as dark as possible, then with your color blender lightly rub that area. Now if you look at the tip of blender you will see that it has some graphite. Now rub the area around the the wobbly circle. If you don’t a have a color blender you can use a tortillon/shading stump. I would recommend that you have both of these tools, they can be helpful in achieving different effects.

Step 4

Pencil Eye Drawing Tutorial
Using your mechanical pencil draw the lines that you see around the area that was shaded previously, try to make them quick and light. If they are random, it would be much better. These lines will serve as a guide of highlights and shadows that the iris has. From the reference picture of the eye above, you can see that the iris is full of highlights and shadows.

Step 5

Pencil Eye Drawing Tutorial
Using your mechanical pencil lightly fill in the area around the pupil. Then with with the blender blend from the center of the pupil out. This will also pull some darks from the center of the pupil, giving that area some shadows.

Step 6

Pencil Eye drawing tutorial
The area outside of the iris layered under the rest of the iris, adding these shadows gives the iris much more depth. Lightly draw them under and blend them with the rest of the dark area. You don’t have to put shadows all the way around, just on random areas.

Similar Tutorial…You can also try

Drawing Realistic Tiger Eye With Pencil

Step 7

pencil eye drawing tutorial
Using your blender pull from the edge of the inner area outside. This will give a nice pattern and will be a guide for the highlights and shadows on the outer area. Make sure you don’t shade the highlights or else you will lose them. You can always erase those areas after so they wont be as bright. You can now begin to see the eye come to life, layering is a big part of pencil drawing and learning what goes on top and bottom is very important. It might take a while to go through all these steps, but the time pays off in the end. After practicing, it will become much easier with each one.

Step 8

pencil eye drawing tutorial
Draw around the whole iris with the 4b progresso pencil, don’t press too hard. This will outline the whole iris. Take your kneaded eraser between your index finger and your thumb then squeeze. This will give the kneaded eraser a fine edge. You will use this to pull some highlight from the area outside of the pupil. Make the highlights going around the area, don’t add too many, just enough that they stand out. If you pull too much graphite, just add more with the pencil, blend it with blender and use kneaded eraser again. You will probably need to make new edge on eraser after each time you pull graphite because it will stick to the edge. If you don’t, next time you try to make a highlight it will not pull as much graphite. These little erasers are amazing and all pencil artists should have them in their tools.

Step 9

pencil eye drawing tutorial
Now blend the area that you outlined on the previous step. If its not dark enough just put down more pencil and blend it, it should look like the image above. On the previous step we pulled out some highlights with the kneaded eraser. Now randomly darken between some of those highlights using your mechanical pencil. This will bring out some of the highlights much more and will also add some shadows. Outline the edges of that area, this will make it stand out. Using your blender blend the edge of the pupil with the area outside. Don’t blend it too much, just enough so the end of the highlights blend out nicely.

Step 10

pencil eye drawing tutorial
Using your progresso pencil draw out that shape that you see on the image above, it doesn’t have to look exactly, but it should be random. Don’t draw the outline too dark, just enough for you to see it. Darken the area below that outline, don’t make it too dark that it will stand out too much from the rest of the iris. Blend it just a bit in some areas so that it blends a bit into the rest of the iris.

Step 11

pencil eye drawing tutorial
Using your kneaded eraser add some highlights around the outer iris. These highlights will be larger than the ones in the center. You can also make some that start from the outer edge of the pupil to the end of the iris, but don’t make too many of these.

Step 12

pencil eye drawing tutorial
On the previous step we added highlights going straight down, here you will add highlights with kneaded eraser in an angle. You’ll be making “W” shaped highlights, just make enough that it will give the iris some texture. After making these highlights, you will add shadows, under some of these highlights. In the image above you can see a very clear “W”, below that you can see a darker area, this will be the shadow for this highlight. Add these shadows to some of the highlights around the iris, not all of them, make it as random as possible. Using your color blender, blend the ends of the these highlights so they don’t look like white lines. In this step we will also start working on the sclera, which is the white part of the eye. The tip of the color blender should still have some graphite, so use that to put down some graphite around the sclera like the image above. The two circles that you see on the right side will be highlights that will suggest wetness.

Step 13

pencil eye drawing tutorial
Taking your mechanical pencil, darken the shadows around the edge of the iris. Add some dark lines in between some of the highlights for so the highlights can jump out more. In this step you can also experiment with highlights, add more or take away. We now have the basic design for the iris, from here on we can start to darken the whole iris by adding light layers of graphite using 2h pencil. If you’re drawing and eye that is blue, green or light in color, you would leave it like this. We also shaded the fold thats under the eyebrow and above the eyelash. Using your kneaded eraser you can erase between the glare spots to blend them together.

Step 14

pencil eye drawing tutorial
Here we will darken the iris. Before we do that we will add some eyelash reflections, you don’t have to add this to all your drawings, but if the drawing is big enough you can. Over the 3 glare spots you can draw some eyelash reflections. The reflection from eyelashes would be reflected on the surface of the eye, since the glare spots are at the top and are white you can draw over them the tips of the eyelashes. Once you have done this, you lightly put down a layer with the 2h pencil over the whole iris. This will darken the highlights, darken the top section of the iris a bit more because this part will be a bit more darker because of shadows of the top of the eye and eyelashes. I added some other details like the reflections on the corner of the eyes. With the 2h pencil i also added some light blood vessels that run out from the corners of the eye. These little details make a big difference in drawing a realistic eye. Look at the reference photo at the beginning so you can see those blood vessels. Darken the sclera, the white part of the eye a bit with the blender, especially the corners. This will give the eye more depth and realism with the subtle blood vessels.

Step 15

pencil eye drawing tutorial
The eyelashes are added, take a look at the angle that they are drawn, they are not drawn straight down,except for the ones in the center. These are drawn last because they are on top of the of the other features. Using your kneaded eraser you can add some highlights,which would be some hairs reflecting some light. You can play around with them to get a much realism. Just make sure you make sure to curve them, they are not straight. The ones in the center don’t have much of a curve because you’re looking straight at them.

Step 16

pencil eye drawing tutorial
We will add now the lower eyelashes, these should be a bit lighter so you can use a 2h pencil to draw them or use the mechanical pencil and then use an edged kneaded eraser to tap along the hair to remove some graphite. Like the top eyelashes, the center ones curve down and you go either left or right so you start to see the curve on the hair.
Well that is about it, it might seem long but with time you will be drawing them with ease. Don’t worry if the first time it doesn’t come out right, keep practicing and you will see results. The more you draw it, the more you will understand each step and it will become much easier. Don’t be scared to experiment, study the reference eye and look at the features. Using the same tools that were used try different ways to put down those details. Be creative with the process, before you know it you’ll your eyes will be glistening and staring at you :)