
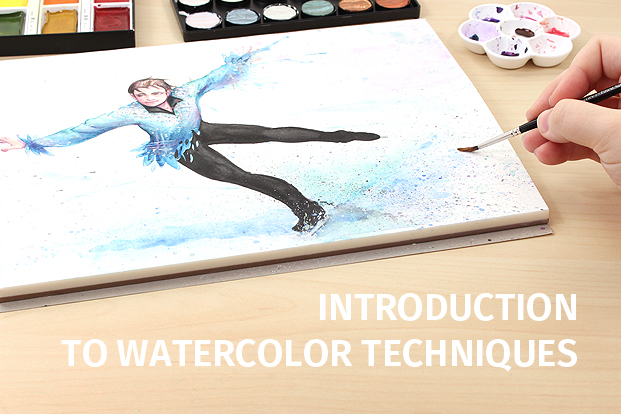
Water colouring introduction
Watercolors can produce extraordinarily beautiful and versatile art, from Cézanne’s loosely formed still lifes to James Audubon’s lifelike birds. They aren’t just for experienced artists, though. Beginners enjoy experimenting with their wide range of color options and blending effects, while their ability to be reactivated with water enables quick fixes. In addition, watercolors require few specialized tools and are easy to store and clean. If you’d like to learn how to paint with watercolors, keep reading. We’ll recommend specific watercolor supplies, go over basic watercolor principles, and discuss techniques that form the building blocks of all watercolor art.
TABLE OF CONTENTS
WATERCOLOR SUPPLIES
You may already have some watercolor supplies at home, but it’s worth using good quality materials even if you’re just starting out. It will be easier to learn and your results will be better. Check out the product recommendations below or get a curated set of supplies with our Watercolor Starter Kit. If you’re ready to start now, watch the video above to see watercolor techniques in action. You can also use the Table of Contents to skip to the next section.
Choose Your Colors
Get the most out of your watercolor paints by choosing colors that mix together well. This lets you combine them to form many other hues. Ideally, your set should include a cool red, warm red, yellow, green-blue, ultramarine blue, and neutrals like black and white. It’s a good idea to make a color chart that shows how your paints mix together. This way, you can quickly choose the right color while you are painting instead of guessing.
You should also look for high-grade paints with a large amount of pigment that will produce more colorful effects. Paints intended for students or hobbyists have larger proportions of binder and filler. They are great for experimenting and learning, but they simply aren’t capable of the same results as artist-grade materials.
Watercolor Paint Recommendations
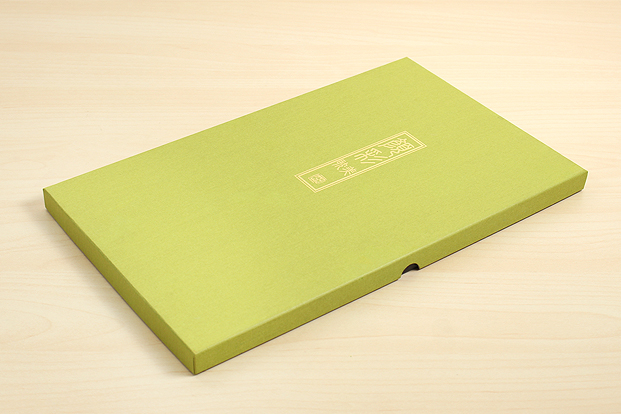
Watercolor Palette: Kuretake Gansai Tambi Watercolors
Kuretake Gansai Tambi Watercolors are professional-grade, traditional Japanese watercolors. These pigment-based, lightfast paints are wonderfully creamy and respond quickly to water. They are relatively thick and can produce intense colors or delicate washes depending on how much water you use. If you water them down, you can see a moderate amount of pigment granules in the paint. Gansai Tambi paints blend very well and come in large pans with plenty of room to maneuver your brush. They are available in individual pans as well as sets ranging from 6-36 colors.
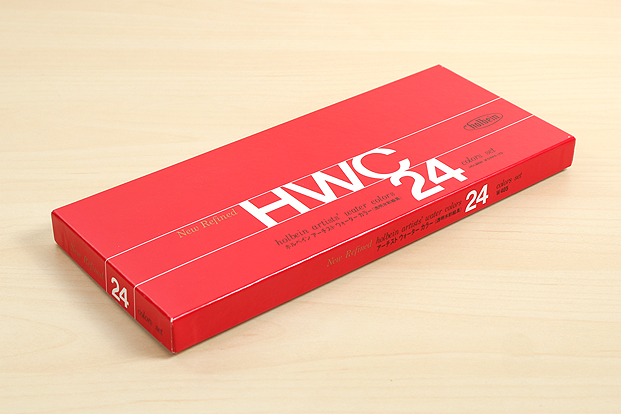
Watercolor Tubes: Holbein Artists' Watercolors
These watercolors are more moist than dry pans and are packaged in squeezable tubes. This makes them very easy to mix in a separate palette. Holbein Artists' Watercolors are richly pigmented and give intense color even if you only use a small amount of paint. They use no dispersants, which allows them to preserve the texture of individual brush strokes and makes them especially good for fine details. These high-quality watercolors come in sets of 12, 18, and 24.
Select Your Paper
It’s best to use paper that is specifically designed for watercolors. Watercolor paper is typically thick and treated with sizing that controls how quickly the paper absorbs water. You’ll often see watercolor paper labeled as hot press or cold press. Hot press paper has a smoother finish that doesn’t allow the water to soak in as much. This makes it easier to use for lifting off, or removing some of the wet color. Cold press paper is rougher and more absorbent. It is the most common kind of watercolor paper and encourages even color distribution and softer edges. Check out our Guide to Watercolor Supplies for more information.
Watercolor Paper Recommendations
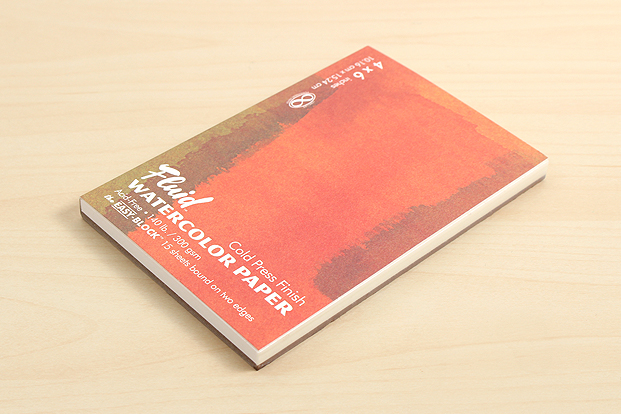
Watercolor Block: Global Art Fluid Watercolor Paper
Global Art Fluid Watercolor Paper is ideal for watercoloring. This heavy cold press paper is glued along two opposing edges to keep the paper from buckling as you paint. This reduces the need for stretching and makes it easier to use on the go. It absorbs water and color well and has a nice texture. The Easy-Block pads are resilient enough to support a moderate amount of reworking, but they will pill if overworked.
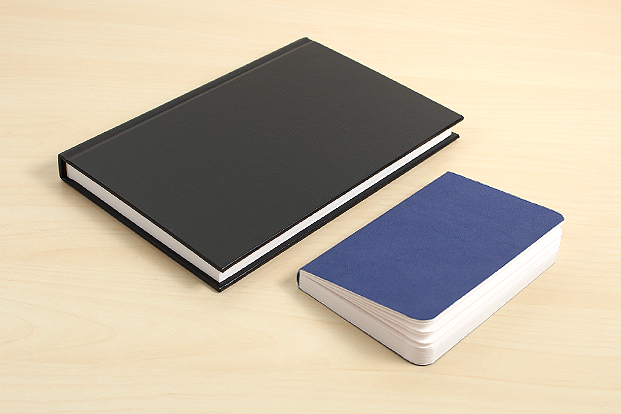
Watercolor Sketchbook: Stillman & Birn Beta Sketchbooks
If you prefer to carry a sketchbook or keep an art journal, Stillman & Birn Beta Sketchbooks are an excellent choice. They use archival quality cold press paper that stands up well to water and has a noticeable texture. These sketchbooks are available as medium-sized hardcovers or pocket-sized softcovers. Try the Zeta series if you’d prefer a smooth finish.
Pick Your Brushes
Look for brushes that have soft, springy bristles and keep their shape well. Watercolor brushes come in many sizes and shapes, but a simple and versatile kit includes:
- A large, flat brush
- A #2 round brush
- A #6 round brush or larger
The flat brush makes washes and broad strokes much easier and faster to apply. The #2 round brush is ideal for details and fine lines, while the #6 round brush lets you add details and broad strokes with one brush. Its larger size helps it carry more paint in its bristles so that your color stays consistent as you work.
Watercolor Brush Recommendations
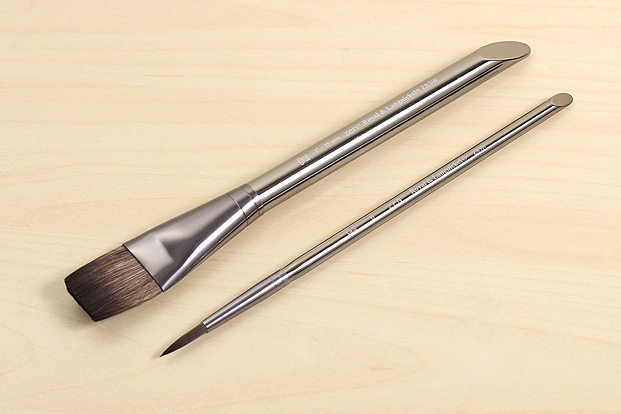
Synthetic Bristles: Royal & Langnickel Zen Brushes
Royal & Langnickel Zen Brushes have springy, absorbent synthetic bristles that hold their shape well. They are equipped with lightweight, chip-resistant plastic handles and strong aluminum ferrules. Their durability and smooth paint application makes them an excellent everyday brush for beginners and experienced watercolor artists alike. Royal & Langnickel Zen Brushes are available in a variety of round and flat sizes, including Round 2, Round 6, and Wash 1".
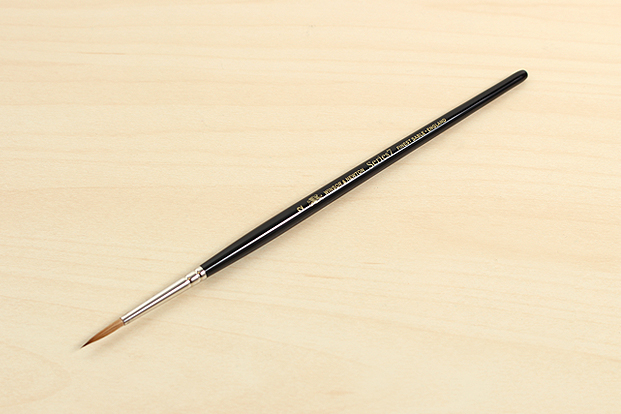
Natural Bristles: Winsor & Newton Kolinsky Watercolor Brushes
If you’re ready to step up to watercolor brushes made with natural hair, you can’t go wrong with Winsor & Newton Kolinsky Watercolor Brushes. They are the crème de la crème of art brushes - made with crisp kolinsky hair tips that have extraordinary point retention, remarkable fluid capacity, and the perfect amount of snap. They are available in small sizes ranging from Round 000 to Round 2 and are perfect for precise detail work.
If you travel a lot or just like to paint on the go, you can also try the Escoda Reserva Kolinsky-Tajmyr Travel Brushes. These compact kolinsky hair brushes feature a stylish metal cap that protects them from travel damage. They come in Round 2, 4, and 6.
Other Useful Tools
Artists often mix multiple paints to find the right color for their work. You can sometimes do this right in the pan, but it’s essential to use a palette if you’re going to be using a lot of that color. This avoids muddying your pans and lets you mix as much paint as you need so that the hue stays consistent.
You’ll also need:
- Masking, artist’s, or washi tape
- Texture & lint-free paper towels
- Plenty of clean water
Watercolor Palette Recommendations
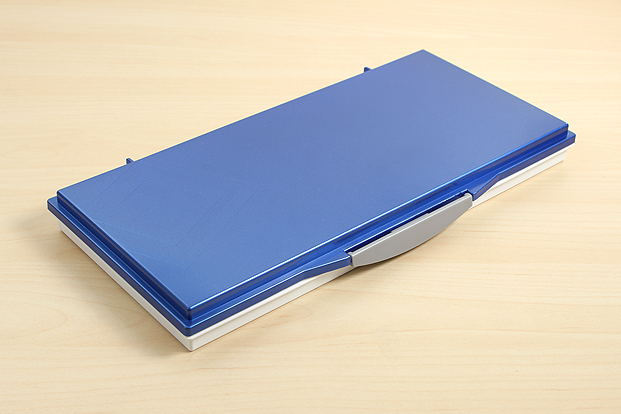
Lidded Watercolor Palette: Heritage Arts Paint Palettes
You can mix paint in any palette, but Heritage Arts Paint Palettes feature large mixing spaces and several paint wells so that you can use as many shades as you need. Their secure, rubber-sealed lids help keep them tidy during long painting projects and make them much easier to travel with.
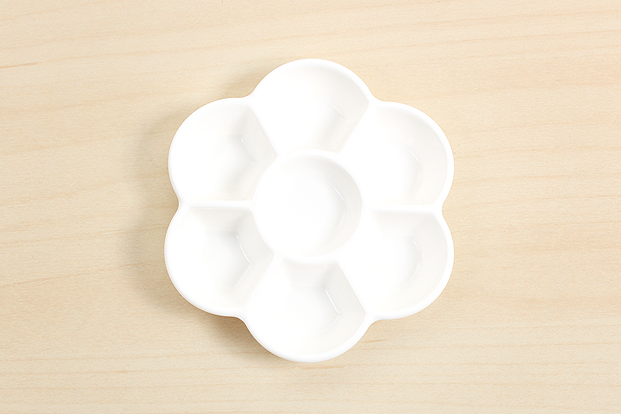
Compact Watercolor Palette: Akashiya Sai Watercolor Mini Palette
The Akashiya Sai Watercolor Mini Palette is perfect for people working with limited space. This sturdy plastic palette features seven wells and comes in a cute flower shape.
BASIC WATERCOLOR PRINCIPLES
Stretch Your Paper
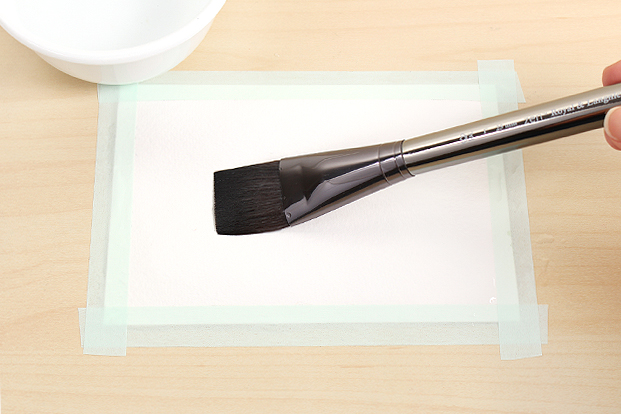
Always stretch your paper to reduce buckling.
Even watercolor paper can warp and buckle from getting wet. To avoid having problems mid-painting, always stretch your paper. Brush both sides of the paper with water and blot it to remove any puddles. You want it to be thoroughly wet, but not dripping. Wet four pieces of tape that are long enough to border the entire sheet and secure the paper to your work surface. Allow the paper and tape to dry before you begin painting.
Work Large to Small
Paint large areas of color before adding details.
To avoid painting over or obscuring carefully rendered details, paint washes and large shapes first. Gradually work your way down to small shapes and details. This also gives your art a more cohesive look by allowing background layers to show through.
Work Light to Dark
Paint lighter colors before adding dark shades.
Always start painting with light colors and gradually work up to darker shades. This approach preserves the vibrancy of lighter hues and keeps dark areas from overwhelming your painting. Think of color like salt in cooking - it’s much easier to add more than to take it out.
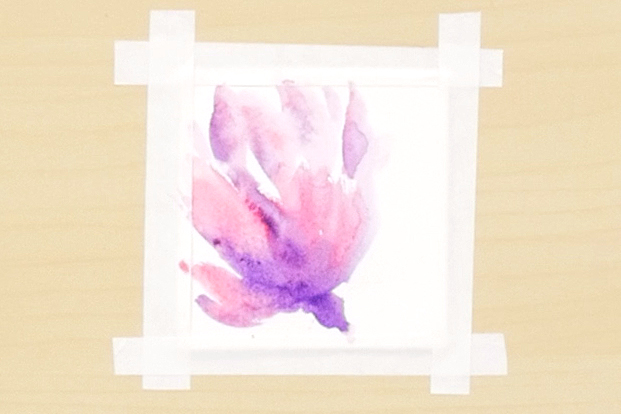
Shade With Contrasting Colors
Use contrasting colors like purple to add shading.
Use dark, contrasting colors to give your painting depth and shape while building visual interest. Indigo, Sepia, and Paynes Grey are good choices for shadows. If you just need to make a color darker, mix it with cool colors like blue or purple. Use brown to darken yellow.
Be Patient!
Wait for your paint to dry completely or colors may run together.
Patience is the most important part of watercolor painting. You will often have to wait for your paint to dry before continuing to work. If you move on too soon, your paint can feather or bleed into areas you’ve already finished. You can also damage the paper if you keep working on a specific area. Wet paper pills and frays when overworked, but allowing it to dry helps prevent this.
BASIC WATERCOLOR TECHNIQUES
Wet/Dry Techniques
You can achieve many effects simply by varying how wet or dry your paint and paper are. In the names of these techniques, the first “Wet” or “Dry” refers to your paint. The second describes your paper.
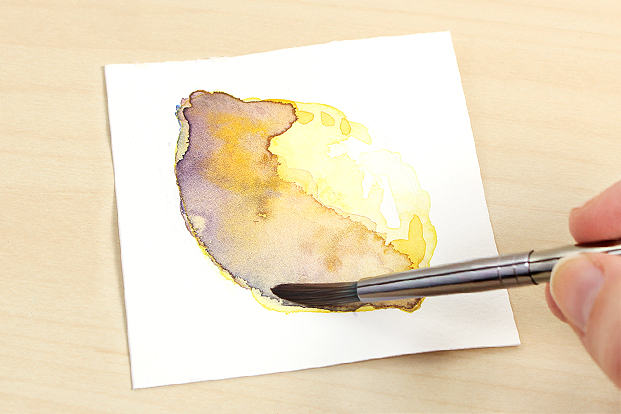
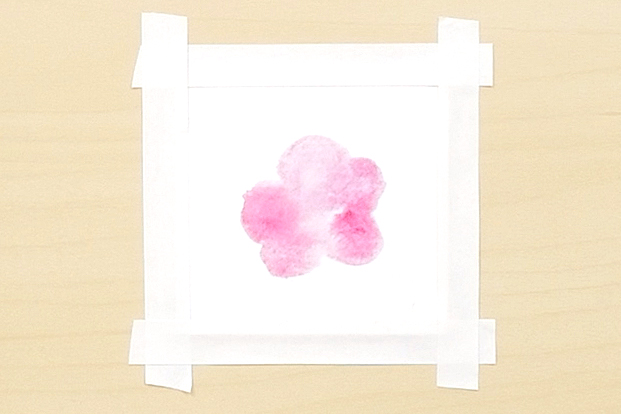
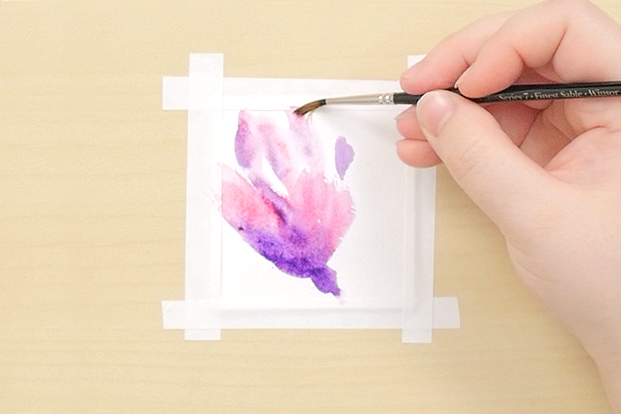
Wet on Wet
Dab or brush wet paint onto wet paper.
The colors will flow together.
This technique uses wet watercolors on wet paper to make irregular shapes with soft edges. Prepare your paint by adding water until it’s quite thin. Then brush the paper with plain water or thin paint. Make it wet enough to be shiny, but not so wet that it forms puddles. Then drop or brush wet paint onto the paper. The paint will spread into the water. This technique is good for covering large areas and putting down initial washes of color.
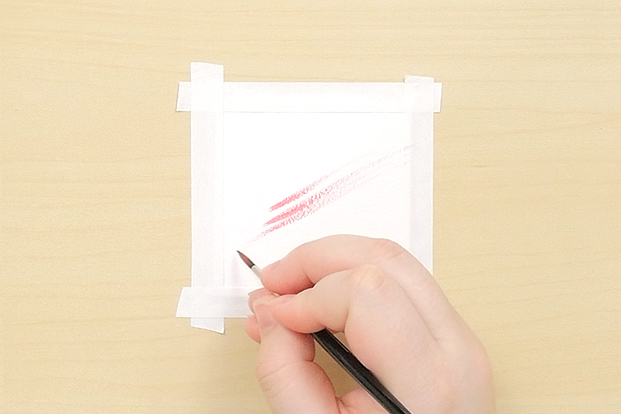
Wet on Dry

Use thin paint on dry paper to make defined shapes.
The paint will dry with hard edges.
Wet on dry is the most common watercolor technique because it gives clean, consistent results. Heavily water down your paint and brush it onto dry paper. You can add more water directly onto the paper if it’s not as thin or spreading as well as you’d like. Use this technique to color moderate or lightly pigmented areas with defined edges. It’s good for both detail work and larger areas.
Dry on Wet
Use thick paint on wet paper.
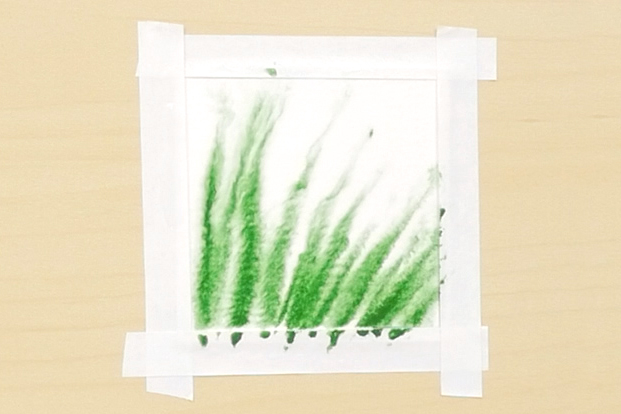
The colors will spread but keep some definition.
This uncommon technique can make some lovely effects. Wet your paper in the same way as you would for the wet on wet technique. Get your paint ready by adding just enough water to make it workable. The color will be thick and concentrated. If you’re working with watercolor tubes, you can use the paint straight from the tubes without adding any water. The paint will spread onto the wet paper to produce blooming effects and soft edges, but you’ll have more control than with wet on wet.
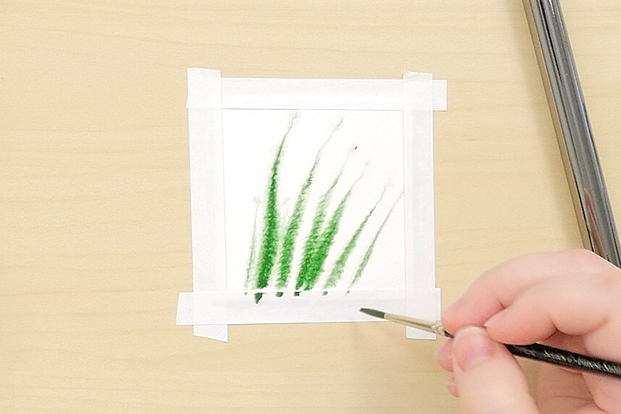
Dry on Dry
Use just enough water to make the paint usable.
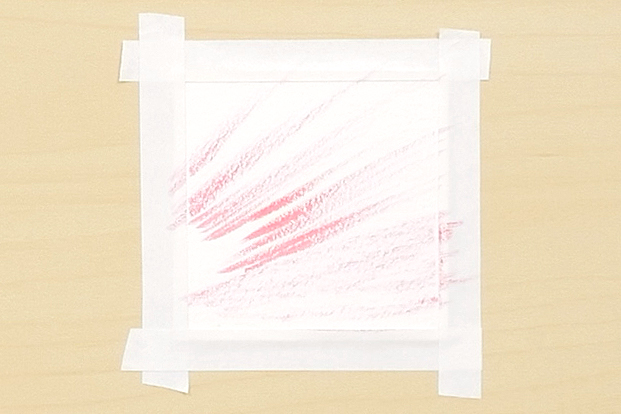
Streaks like these make great textures.
Watercolors are known for washes and flowing strokes, but that’s not all they can do. Mix as little water as you can with your paint and brush it onto dry paper. The line of the paint will skip and break to form interesting textures. You can also use this technique to add intensely colored details to your painting.
Layering
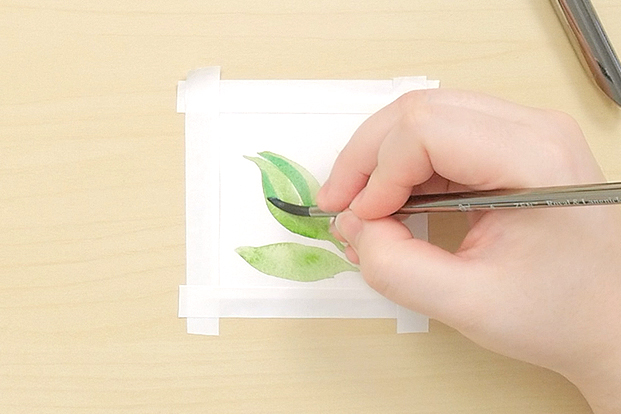
Add darker colors after previous layers are fully dry.
Layers give your painting dimension and depth.
Watercolors are mostly transparent. This means that the underlying color will show through if you paint over something. If you layer multiple colors on top of each other, you can develop striking undertones and great depth in your painting. This is an ideal way to add shading.
Make sure to wait for the first color to dry completely before painting over it. If the previous paint is still wet, the new paint will mix with it instead of layering. Try to add shading with colors other than black - this will make your paintings more interesting and energetic.
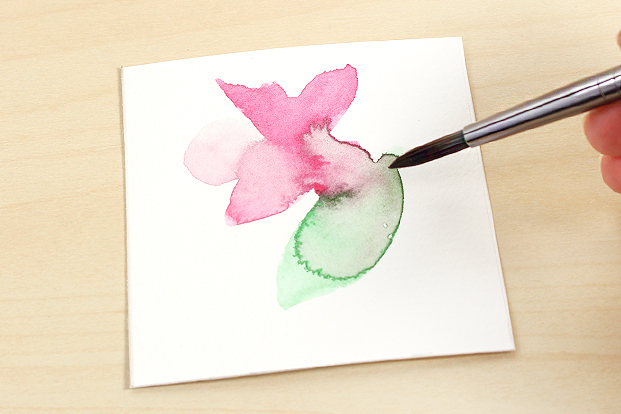
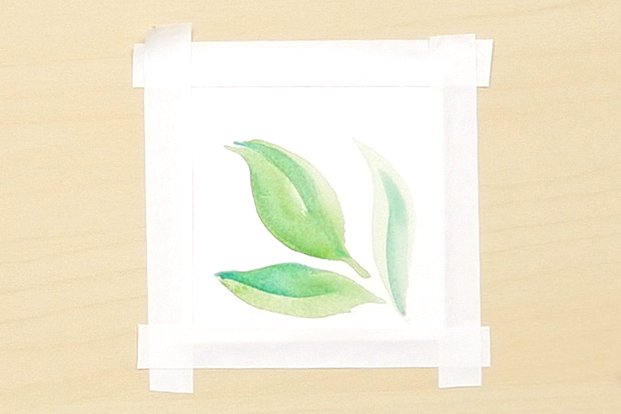
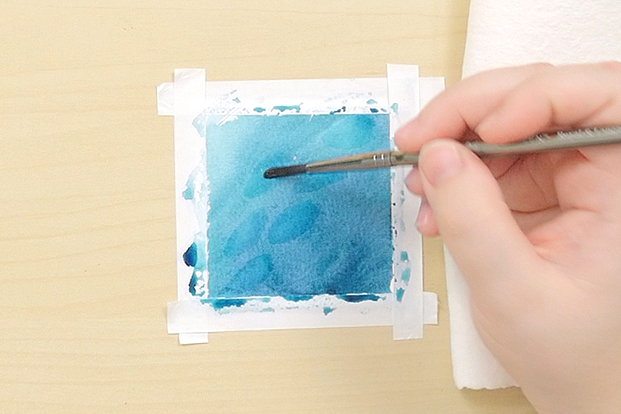
Blending
Tease colors together with a wet brush.
Blending smoothes the transition between colors.
Soften the edges of dry paint and help different colors blend together by gently stroking them with a wet brush. Blot the edge of the wet area with a paper towel to keep a hard line from forming unless you’re working with wet paper. Blending and layering are both easier to achieve on cold press paper because it facilitates even color distribution.
Scrubbing
Scrub unwanted pigment out of the paper with a wet brush.
Scrubbing does not remove color entirely.
Scrubbing allows you to lighten paint that you’ve already placed on the paper. Rub the paper with a wet brush, then blot it dry with a paper towel. The Caran d'Ache Water Brush - Fiber Tip works especially well for this technique. It has a firmer tip that lets it scrub into the paper fibers to remove more pigment. Keep in mind that scrubbing is very hard on paper. We recommend only using it lightly or on cotton paper like Global Art Fluid 100 Watercolor Paper.
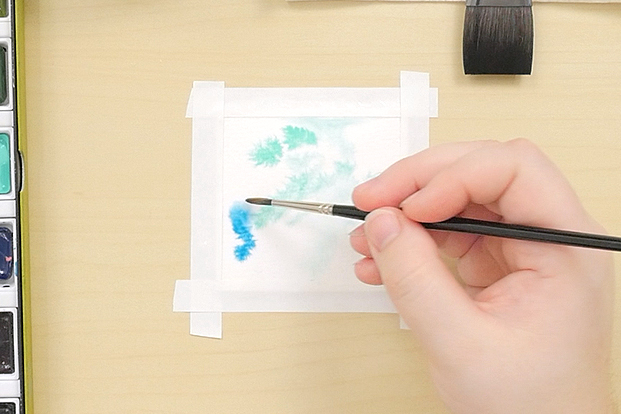
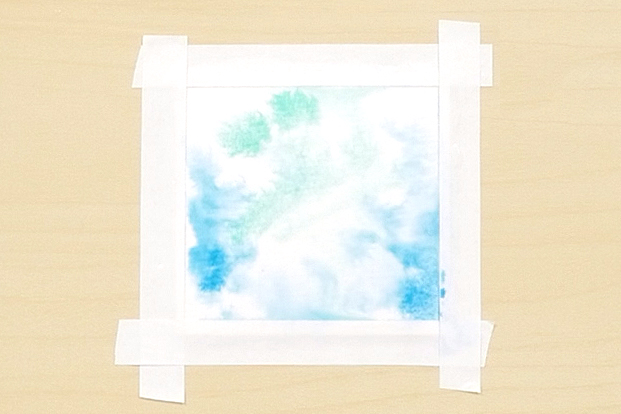
Lifting Off
Let water sit on dry paint to reactivate it before lifting off.
Lifting off is a more gentle way to reduce color.
Lifting off is a gentler option for lightening color. If the paint is still wet, simply dab it with a paper towel or dry brush to soak up some of the color. If it’s dry, reactivate it with plain water first. Let the water sit for a while to pull up more color. You can use lifting off to fix mistakes, remove pools of excess paint, or to add unstructured, light-colored features like clouds or sunbeams.
OTHER WATERCOLOR TECHNIQUES
If you’re comfortable with the basics, it’s time to branch out. These techniques help add interest to your work.
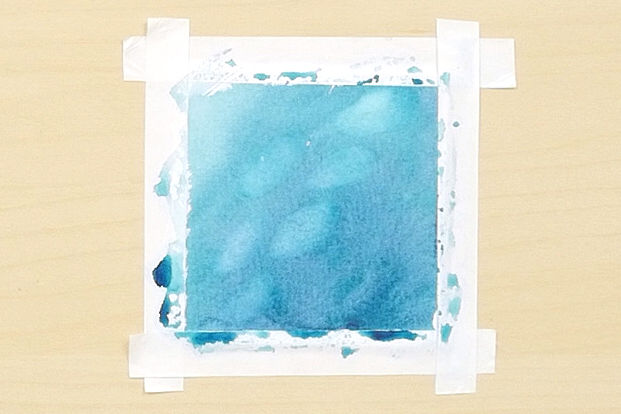
Masking
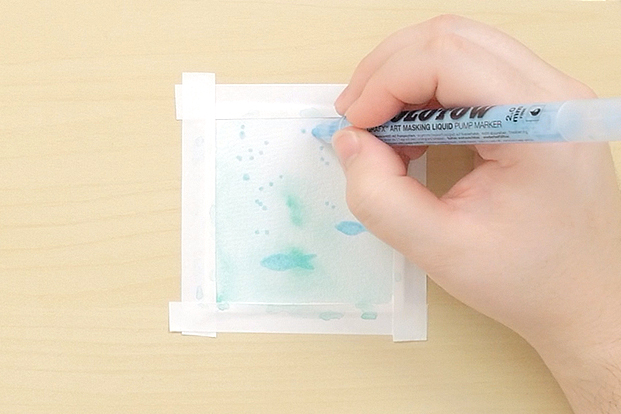
Make sure your paint is totally dry before using masking fluid.
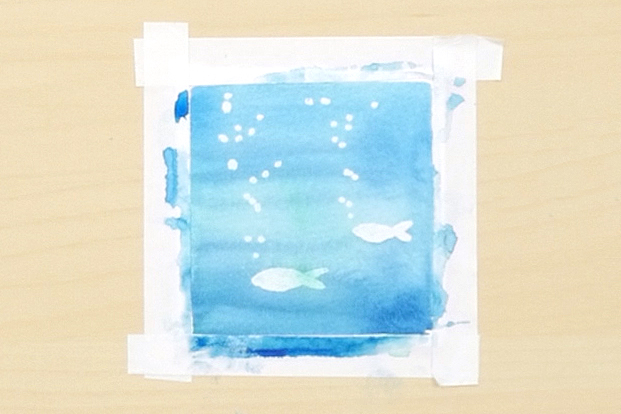
Rub the masking fluid off to reveal the paper underneath.
Plan ahead to allow previous layers of color or the bright white of plain paper to peek through in your finished piece. Make sure the paper is completely dry. Apply a thick layer of masking fluid to the area you want protect. If your masking fluid comes in a bottle, use an old brush to apply it since it will ruin the bristles. If your masking fluid comes in a pen applicator, use it just like you would a marker. This is another technique that can be rough on paper, so it’s a good idea to use more resilient options like cotton paper.
Allow the fluid to dry and paint over it normally. When the paint is totally dry, rub or peel the masking fluid off. This is a great way to preserve highlights and vivid white details.
Making Textures
There are a variety of ways to add texture to your work. These are just a few of the things you can try - experiment on your own and see what you come up with.
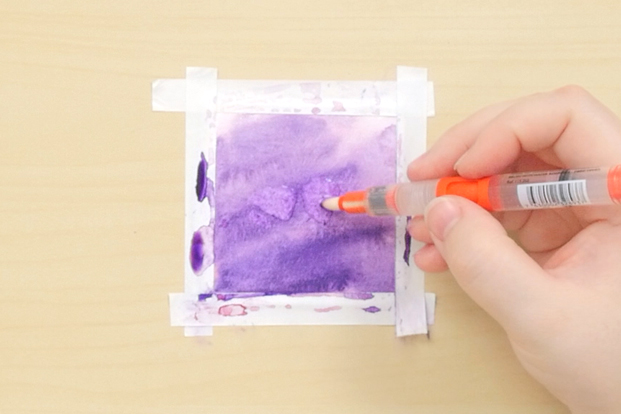
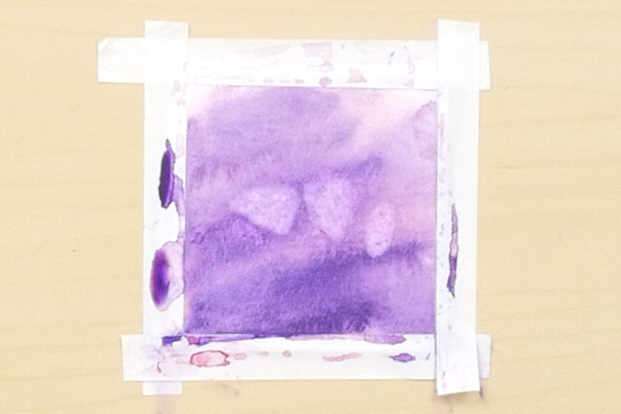
Salt & Alcohol
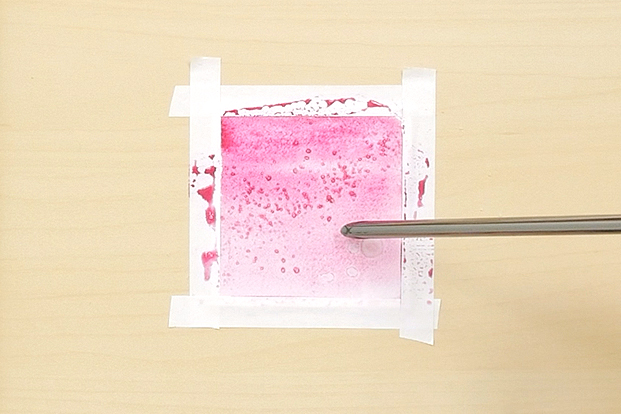
Use the handle of your brush to dab alocohol onto wet paint.
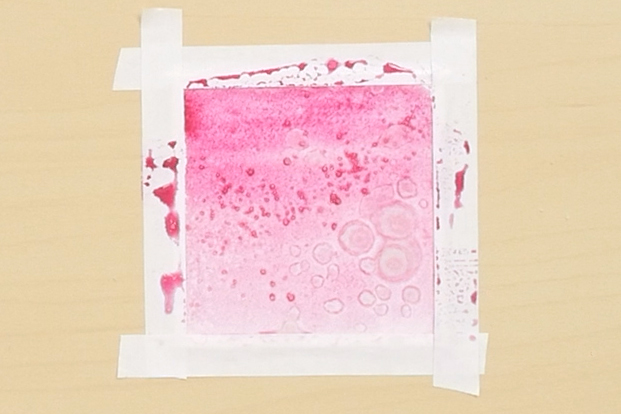
Salt and alcohol dry to form dappled textures.
Both salt and alcohol give wet paint a mottled look. Sprinkle salt crystals into wet paint. The salt will draw up the water and leave small light spots when the paint dries. If you are using alcohol, dip an object into rubbing alcohol and touch it to the wet paint. The alcohol will push the paint away to form light marks that resemble bubbles.
Splattering

Flick paint onto your paper.
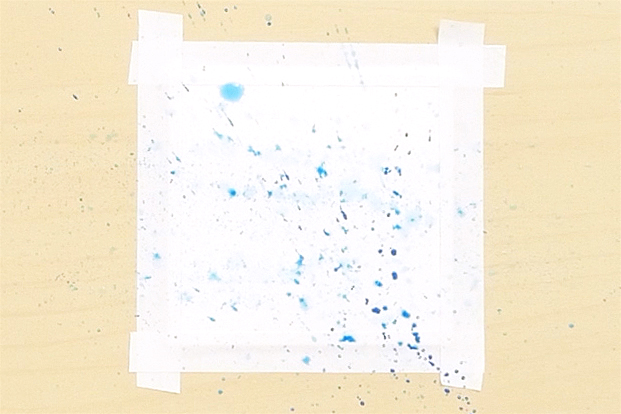
Dots and streaks make natural-looking textures and sprays.
Who says you can’t play with your art supplies? Load your brush up with plenty of wet paint and flick it onto the paper. Splattering makes dots and streaks that are great for starry skies and background textures. We recommend putting some newspaper down first, though - this technique can get a little messy.
Blowing
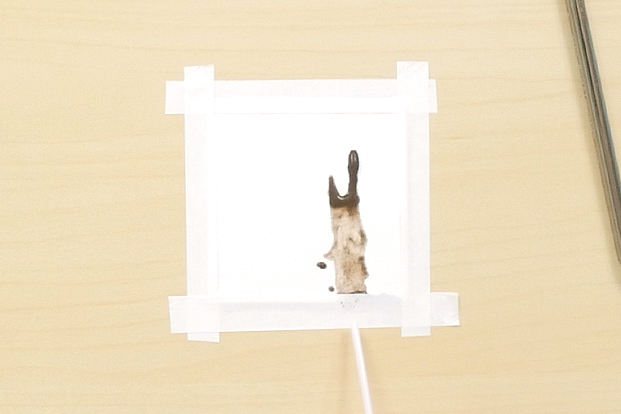
Use a straw to blow paint along your paper.
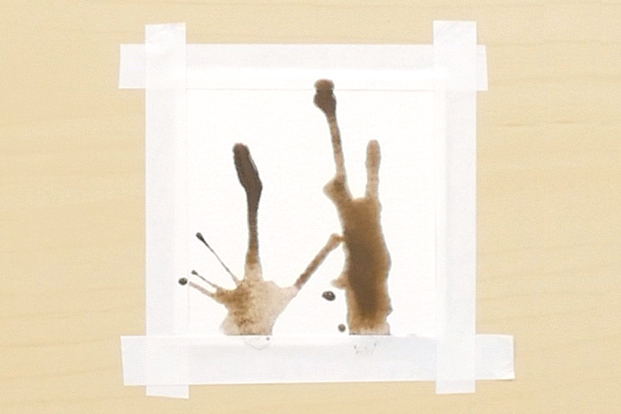
This is a fast way to make plant-like shapes.
Place a large, wet dollop of paint on your paper. Then blow on it through a straw. Change the angle of the straw to direct the paint along the paper and encourage it to form branches. This is a fun way to make organic line shapes like trees or distant rivers
No comments:
Post a Comment